Monday, October 8, 2012

Jack Skellington Crafts

Halloween is just around the corner and if you are a Disney fan, Jack Skellington probably comes to mind.  We love to watch the "The Nightmare Before Christmas" at our house each October.  It's like a kick-off to the Halloween season! 

If you'd like to include Jack Skellington in your Halloween decorations this year, here are few great ways to do it:
Go all out and have a Jack Skellington party!  The perfect dessert for that party would be Jack Skellington cupcakes!  Find out how to make them by clicking here

Have fun, get creative and have a Happy Halloween!

Wednesday, September 19, 2012

Quick Tip: Break the Yolk

When making scrambled eggs or adding eggs to a recipe, break the yolk of the eggs with your fork first.  It will make whisking them easier and combining them with other ingredients, faster. 

Thursday, September 13, 2012

Make Your Own Big Book of Boo Boos

If you have little ones, you've probably heard of Disney's new show, Doc McStuffins.  My daughter loves this show and loves to give everyone in the family "check-ups".  Doc McStuffins has a Big Book of Boo Boos that she uses to keep track of all the boo boos she encounters with her toy patients.  So, I thought it would be fun to make one for my daughter to use while she gave us our check-ups. 

I was so happy and excited to find that the Disney Junior website offered print-outs to make your very own Big Book of Boo Boos!  Here's the link - Doc McStuffins Big Book of Boo Boos

I changed it a bit for my daughter and used a 3 ring binder I already had.  I put a piece of purple construction paper with the heart print out glued to in, in the clear sleeve on the front of the binder.  Then I printed out the boo boos from the show and  punched holes in them to put in the binder.  Then I added extra lined paper for my daughter to record the boo boos she finds during our check-ups.  She loves it and can't wait for her brothers to get home from school to get started!

I hope you enjoy this simple craft as much as we did!  Get creative and have fun!


Wednesday, September 12, 2012

Quick Tip: No More Soggy Sandwiches

Are your kids complaining that the jelly on their PB&J has soaked through the bread by the time they get to eat lunch at school? Or that their sandwich was soggy at lunchtime? Here's a quick tip: Spread peanut butter on both pieces of bread and then add the jelly on top of the peanut butter. With a meat and cheese sandwich - lay the meat on one slice of bread and cheese on the other slice. Then add mayo or mustard on top of the meat and/or cheese. You still get the flavor you want but, by keeping the wet ingredients off the bread, you lose the soggy factor.

Sunday, July 29, 2012

Apple Print Onesie

I'm throwing an apple themed baby shower for a teacher and found the perfect craft for it!

Supplies:
  • 1 apple
  • 1 green fabric pen
  • red fabric paint
  • onesie (or t-shirt)
Directions:
  1. Put a piece of cardboard topped with a paper towel inside each onesie.
  2. Cut the apple in half and pat on a paper towel to dry off juices. 
  3. Dip the apple half in the red fabric paint. Wipe off excess paint and then press on onesie.
  4. Use green fabric pen to add a stem and leaf. Let dry.
Create an apple print gift bag to present gift in. Use same technique as above but instead of fabric paint, use a red ink pad. Add stem and leaf with a regular green marker. Get creative and have fun!

Thursday, July 26, 2012

Pipe Cleaner Crowns

My little girl loves to have "Princess/Prince Parties" with her big brothers. Tonight she had the most wonderful idea: make crowns out of pipe cleaners! So we pulled out all our pipe cleaners and got creative. We even made bracelets and rings. It was fabulous!

Monday, July 23, 2012

Leaving Your Family Pet with a Pet Sitter

A new member of the family joined us 5 months ago.  Mickey is a Miniature Schnauzer mix and the sweetest puppy ever.  We have taken a few trips since having him and have been blessed to be able to take him with us.  However, we took a trip out-of-state and he could not come with us.  So we talked to family and friends and looked into kennels/pet boarding locations.  But, I was just too worried about leaving him in an unfamiliar place with strangers.  Besides, we would prefer to have him at home where he feels safe and comfortable.  So, we decided to find a pet sitter to come by a few times a day to let him run around the backyard and feed him.

The first people we thought of were our babysitter!  She lives just across the street and recently mentioned that she is saving up for a car.  Also, they have always had a family dog that she helps look after.  So, a familiar face for our puppy and she is close by, so coming over a few times a day wouldn't be too much to ask.  We were so excited when she agreed to watch him for us.

We had spoken to a kennel and they were going to charge us $10/day.  So, that's what we paid her.  Before we left, we let her know his routine.  We also wanted to leave her helpful information in case of emergencies.  So, I hit my keyboard and found the perfect downloadable template - Pet Care Instructions.  What I like most about it is that it includes all the areas I wanted to cover for my pet sitter but, I was also able to download the form and change it to fit my needs exactly.  I filled out the Pet Care Instructions form and was sure to leave a copy of his up-to-date vaccination records - just in case.

After being away from our pup for almost a week, when we returned I think he was disappointed that he wouldn't be seeing our pet sitter every day.  But, that made me even more confident with my decision to have a pet sitter watch him at home.

Campbell's Cream of Mushroom Pork Chops

A dinner my mom used to make for us that has only a few ingredients and is not only easy but fast to make is Campbell's Cream of Mushroom Pork Chops.  Campbell's actually has a very similar recipe on their website called Tasty 2-Step Pork Chops.  This is how I make it:


Ingredients
  • 4 Pork Chops
  • 1 can of Campbell's Cream of Mushroom Soup
  • olive oil
  • 1-2 garlic cloves or garlic powder
  • salt and pepper
  • 1/2 cup milk (or water)
Directions
  1. Brown garlic in oil then remove garlic.
  2. Put pork chops in same pan.  Sprinkle pork chops with salt and pepper (and garlic powder if you didn't have garlic).  Brown on each side.  Then remove pork chops.
  3. Add cream of mushroom soup and milk to pan.  Cook as directed on can using a whisk to include all the delicious pork chop flavor from the pan. 
  4. Return pork chops to pan with soup and continue to cook until pork chops are done.
  5. Serve over rice or egg noodles.

Saturday, June 23, 2012

Pool Noodle Fun!

I saw an article in a recent Parents magazine about all the fun you can have by getting creative with pool noodles called, "Use Your Noodle: Pool Noodle Backyard Games".  I was a little worried about the cost, since I'd never bought a pool noodle before but, I found them at our local Dollar Tree for $1.00 and I figure I could do the activities listed in the magazine for $12-15.00.  I am sold!!!  The next time I'm out and about, I'm buying a bunch of pool noodles, pulling out my husband's duct tape and using chopsticks from our recent trip to our favorite Chinese restaurant.  Then we are going to make it a family activity by working together to create our own obstacle course/backyard games.  My kids can't wait!!!


Friday, June 15, 2012

Painting with Shaving Cream

A few weeks back I found a picture online of a muffin tin filled with different colored shaving cream.  I thought "What a great idea!" and I immediately wanted to try it.  However, I thought it would be much more fun for my kids to do in the shower. 


Although a muffin tin would be great for a dry activity, it wasn't my first choice to use in the shower.  So, I used a divided rectangle Ziploc container I had for my husband's lunches.  We can keep it in the shower and not worry about rusting and it's easy for the kids to hold.  Having the separate compartments makes it easier to keep the colors separate but it isn't necessary.  The shower walls and clear shower curtain were a perfect blank canvas for the kids. They had a blast!


This is what you need:
  • Shaving Cream
  • Food Coloring
  • Paint Brushes
  • Container for "paints"
I used my husband's shaving cream which is only about $1.  The food coloring I already had but, it's only a couple of dollars a box of four in the grocery store.  The paint brushes I picked up in a 3-pack for only $1.  You can use anything laying around the house to keep you "paint" in: old yogurt bin, plastic bowl/plate, etc. 


If your shower is tiled, be careful because the food coloring might stain it.  This activity would also be fun to do outside in the summer too.  I think I'll let my kids do this in our inflatable pool!  Be creative and have fun! 

Monday, June 11, 2012

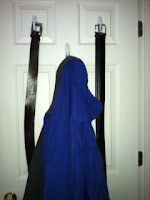
Get Organized with 3M Command Hooks

We have some much stuff in our house with five family members.  Often times things get lost in the closets from falling down or just getting tossed in.  So, I got organized with 3M Command Hooks.  These things are awesome!!!  They aren't just for Christmas lights and holiday decorations (which I started using them for).  This is what I use my hooks for:
  • Keeping book bags/backpacks off the floor and easily accessible
  • Hanging Coats
  • Storing Belts
  • Hanging necklaces and keeping them from tangling
"A place for everything and everything in it's place."  It's a motto I am trying to live by.  Get creative, get organized!


Saturday, June 9, 2012

Quick Tip: Summer Playdate Contact Cards

Every summer my kids miss their classmates.  Since teachers don't send home classroom contact lists, I don't have anybody's information.  So, to be sure we stay-in-touch with my children's friends, I make Summer Playdate Contact Cards.  On index cards I wrote my child's name, my name, my contact information and a short note saying my child would like to get together over the summer.  I gave each of my kids three index cards to hand out to friends they want to visit this summer.  I've already gotten two calls from moms and school just ended two days ago!  Looking forward to a summer fully of friends and fun.

Wednesday, May 23, 2012

Great Wall of China Model

As mentioned in my post, How to Make a 3D Model of a Pyramid, my 2nd Grader is participating in a class project called "The Amazing Race".  Each student is supposed to "visit" five of the seven continents and do a "task" for each visit.  The 3D pyramid was for Africa.  My sons next continent was China and he decided to create a model of the Great Wall of China. 
So, off to the Internet I went to find ideas on how to make the Great Wall of China.  I found a great blog called, Confessions of a Homeschooler.  Her idea was awesome and fairly easy.  But, I had to make modifications to suit us and make it our own. 


I couldn't find Styrofoam blocks at my local stores, nor did I have time to order them online (we only had an afternoon to build it).  However, I did find a block of Styrofoam at Walmart.  It was about 2 inches x 12inches x 18 inches.  I had to cut this large block into small bricks.  I only used 3/4 of the block for this project 


I had never worked with Styrofoam so, I tapped away on my keyboard until I found a great website discussing the basics of working with Styrofoam.  They include a great informative video - STYROFOAM Tips.  From the video I learned how to cut Styrofoam, which glue I could use, and how to paint it too!

Supplies
  • 1 foam poster board
  • 1 block of Styrofoam, 2"x12"x18"- (you could use store bought Styrofoam blocks)
  • hot glue gun
  • acrylic paint (gray)
  • stiff paint brush
  • cardboard (we used a fruit snack box)
  • scissors
Directions
  1. Cut the Styrofoam block into small blocks/bricks with a plastic knife (run it through a candle first, to make cutting easier).
  2. Using the hot glue gun, glue two parallel rows of Styrofoam blocks onto the foam poster board to create the base of the wall.  Make sure it is curved just like the real thing.  Be sure to include stairs at either end.
  3. Add a second row of blocks on top of your base in a staggered pattern.  Repeat to make the wall as tall as you like.
  4. Hot glue the cardboard on top to make a walking path.  Trim the cardboard with scissors to fit. 
  5. Add another row of blocks along the edge of the path (cardboard).
  6. Build a tower with the blocks in the middle of the wall.
  7. Dip paint brush into paint and tap onto the the Styrofoam bricks, the cardboard path and around the base of the wall.
  8. Use construction paper and a glue stick to create a mountain and some grass around your wall.

Tuesday, May 22, 2012

How to Make a 3D Model of a Pyramid

My 2nd Grader is participating in a class project at school called "The Amazing Race".  They have to do a project for five of the seven continents and whoever completes their project before a certain date will receive a prize.  My son decided to make a 3D model of a pyramid for Africa.  So, I hit the keyboard and found lots of different ideas for making a pyramid on Squidoo.  One stood out to us and we decided to make a similar one but make it our own with a few changes.


Supplies
  • 8 dowel rods (found at Michael's Craft Store)
  • hot glue gun
  • pipe cleaners
Directions
  1. Use the hot glue gun to glue 4 of the dowel rods into a square.
  2. Glue the bottom of each remaining dowel rod to one corner of the square at an angle, so that the tops meet together above the center of the square.  (Tip - We used Play-doh to help keep all the rods in place until we were able to glue them.  This allowed us to make sure the angle was correct when we glued it.)
  3. Glue the top of the 4 angled dowel rods together.
  4. Wrap the sides and joints of the pyramid with pipe cleaners.
  5. Print out or draw two pictures of a mummy or sarcophagus and glue them together, back to back.
  6. Punch a hole in the top of the image and hang it inside the pyramid with a pipe cleaner.
I added 5 smaller dowel rods across the base of the pyramid because my son was worried someone might try to wear the pyramid as a hat but, this is not necessary for the structure.  We had so much fun my two younger children wanted to make structures of their own with the remaining supplies. 

Friday, May 18, 2012

My New Addiction - Thirty-One!

I was introduced to Thirty-One about 6 months ago and now I'm hooked!!!  I tend to refer to Thirty-One as today's version of a Tupperware party but more fashionable.  They have a great variety of bags, purses and more to help organize your life.  As a mom of three, I'm all about organizing!  I am slowly building my own collection.  I love the products so much, I'm considering becoming a consultant.


I was invited to my first Thirty-One party from a fellow PTA member.  I went without planning to buy anything, not knowing what I was getting myself into.  But, as soon as I saw all the beautiful bags and patterns, it took me a while to decide what to get.  Even after I left the party I had a wish list for the next party I would attend.


However, after finding out about the amazing Hostess Rewards, I decided to throw a party of my own.  By just having a party, I earned $125 worth of free Thirty-One products, 2 half-priced items (with half-priced personalization) and the chance to purchase two products exclusive to hostesses only.  I knew then that I would be throwing another party in the future!  Another great bonus, when a guest from my party decided to throw a party of her own, I received a free bag with free personalization!  Talk about rewards!!


Each month Thirty-One offers a Monthly Special discounting some of their most popular products!  For example, this month the special is "For every $31 you spend, get an All-In-One Organizer for $5."  That is a savings of $20!


My favorite products so far are the Large Utility Tote and the Hang-Up Home Organizer.  I keep a Large Utility Tote in my car to help me carry several bags up stairs to my kitchen.  I also use it for road trips and carting donations to my kids' school.  I have friends that use it for going to the beach or pool, tailgating or even laundry.  There are so many ways to use the Large Utility Tote, the possibilities are endless.  I don't know what I would do without my Hang-Up Home Organizer!  It has helped me declutter my desk and kept me from losing important papers in piles of paper.  I use the four pouches for each of my three kids and one for my husband and me.  I keep track of the meals I'm cooking for the week, party invitations, and school papers.  Also, it really looks great on my wall.  It's like a functional art piece.   


You can make Thirty-One products your own with the personalization option.  You can choose from a variety of thread colors and fonts and label it any way you like - your initials, your name or something like "Summer Fun", "Laundry" or "Going Fishing".  Check out the current catalog online - Thirty-One Catalog.  Get creative and have fun!

Monday, May 14, 2012

New Baby Favorite - Portable Cradle

My sister recently had a baby and bought a portable cradle for her and it's awesome!  It's the Fisher-Price Newborn Rock 'n Play Sleeper and it costs around $50.  I wish I had one when my kids were babies!  My niece loved it so much but now at 9 months old and 20 lbs, she out-grown it.  So, it was handed to my other sister for her baby who is 4 months old and she loves it too!  

There's no need to lug around a big, heavy Pack-N-Play for your tiny new addition when visiting family and friends.  The sleeper is lightweight and foldable, making it easier to take on trips to visit family and friends.  It also has a buckle to keep baby safe and secure.  It's even rockable, making it easier to get your little one to sleep.  It has a deep seat, increasing the snuggle factor for baby and keeping them super cozy.  One of the best parts is, it's backrest is inclined.  So, for those of you with babies who have gas or a cold, this will help them sleep better.  

You can place it next to your bed and have easier, faster access to your baby.  Or keep it next to your couch while you fold laundry or watch your favorite show.  It's easy to take with you from room to room but, please don't move the sleeper with baby in it.  This shouldn't be a problem since it's so lightweight you can carry it with one hand.  BONUS - the cover can be removed and tossed in your washing machine!

This is definitely going to be a recommendation for all my friends expecting or planning to have a baby.  It would also make a great baby shower gift!!  Here's to making a difficult time in a mother's life a little easier and more enjoyable.


Thursday, May 10, 2012

Teacher Appreciation Gifts

This year I got a gift for each of my child's lead teacher, our bus driver and the new Assistant Principal who was a huge help to us this year with our son.  We love to give to the teachers when we can but, we don't have as much as we would like to give.  So, I try to make the best of what I can find. 

This year I found some great gifts in the $1 bins at Michael's craft store (my favorite place to go for teacher gifts).  Since we are giving the gifts for Teacher Appreciation Week and the school year is almost over, I decided to put together a "pampering kit" for the teachers to help them relax and rest up over the summer.

Pampering Kit ($1 items from Michael's):
  • Nail Files - 2 pack
  • Sleep Mask
  • Manicure/Pedicure Kit
  • Back Massager
Each of the items came in 4 or 5 different colors.  So, I gave each teacher all the items in one color and put them in a gift bag ($0.79 at Michael's) that was the same color.  I buy white tissue paper in bulk, so I already had some at home.  I only used one sheet of tissue paper for each bag. 

I added a little something to spruce up the packaging.  I had ribbon at home from the hair bows I make my daughter.  So, I used coordinating ribbon to make a bow on each bag.  From the bow I had their name that I printed out on card stock and cut out with decorative craft scissors.

I also had note cards that I bought from the $1 bin at Target (10 note cards for $1).  So, I used those to write thank you cards to the teachers and tell them how grateful for all their hard work and for being kind to our kids.

I think they turned out great!  I hope the teachers like them as much as I did.  =)  Happy Teacher's Appreciation Week!!!


*These gifts are also great for End of the Year teacher's gifts, Mother's Day gifts and Christmas gifts too!

Tuesday, May 1, 2012

Quick Tip: Frizz Control

My hair stylist taught me a couple of simple tricks to help me control my frizzy hair and they work!
  1. Cold Rinse - rinse your hair with cold water after conditioning.  Similar to shingles on a roof, hair cuticles lie flat after a cold rinse.  This results in less frizz and more shine.  When you rinse your hair with hot water it causes your hair to be more frizzy or rough looking.
  2. Cool Shot - finish with the cool shot on your hairdryer.  A cold rinse definitely helps but how you dry your hair will make it last.  To keep the frizz down, apply a serum to damp hair before blow drying (I use Rusk's Softwear).  Then finish with a cool shot from your hair dryer.  I use the Revlon Ionic Ceramic Pro Stylist Dryer but any hair dryer with a cold shot will do.  

Friday, April 27, 2012

Ways to Stay Sane as a Mom

  1. Embrace the Chaos and have a dance party.  I head to Grooveshark and create a playlist full of high energy dance songs and let the kids go wild.  I like to join them.  My kids are great about not criticizing my moves.  =) 
  2. Give yourself a Mommy Time-Out!  Plop the kids in front of the TV or sit them at the table with a stack of coloring books and hide out in the bathroom.  It's the best place to hide for most moms and a great time to flip through that magazine you got in the mail. 
  3. Exercise!  When your husband gets home, pull your walking shoes on and kiss him on the way out the door.  Head to the gym or just walk around the neighborhood to blow off some steam.
  4. Schedule a monthly Moms Night Out.  On the last Wednesday of every month a few friends from church and I go to Wednesday night church service and then meet up for coffee afterward.  It's a great way to lift our spirits and have girl time too! 
  5. Think Like a Kid and color, play in the sprinkler, get messy,...  You won't believe how much fun you'll have.   
  6. Ask for Help from your husband, family, friends, or neighbors.  You've heard of "it takes a village to raise a child".  Well, it's true and it benefits not only you but your kids too.
  7. Rock Out in the Minivan/Swagger Wagon! Listening to the kids music all the time can make you go crazy on it's own. So, the next time you are cruising around town with the kids, turn up your (child appropriate) music, roll down the windows and sing along to the tunes. You may get a few stares but, your kids will get a kick out of you letting your "hair down". Be sure to keep your hands on the wheel, eyes on the road and have fun!
  8. Laugh whenever you can!  Start now by watching this video:

Tuesday, March 6, 2012

Quick Tip: Save the Chocolate Syrup!

Stop tossing out the last couple of servings of your chocolate syrup.  Just open the lid and put the bottle of chocolate syrup in the microwave and heat for 10-15 seconds.  It melts all the syrup off the inside of the bottle making it easy to pour out.

Thursday, January 19, 2012

Printable and Homemade Valentines

Disney Family Fun magazine has done it again - they have my favorite Valentine's Day crafts of the year!  This year they even share Printable Valentine's Day Jokes and Printable Valentine's Day Cards.  These are great for your child's class.  You could also use them as lunch box notes for your kids leading up to Valentine's Day.  Family Fun also has cute crafts that I plan to use for my kids' classroom celebrations this year.  My top favorites are:
Share these crafts with those you love this Valentine's Day or any time you want to spread the love.  For more Valentine's Day Crafts visit my post from last year:  Valentine's Day Crafts and Homemade Cards.  Happy Valentine's Day! 
 

Tuesday, January 17, 2012

Quick Tip: Cleaning Counter Tops

If you cook, have kids or a messy husband, this is a good trick to know.  When toothpaste dries on your bathroom counter top it can sometimes seem you may need a jack-hammer to get it off.  Same goes for dried spaghetti sauce on your kitchen counter or even the floor.  Try this easy trick to help get your dried goo cleaned up:
  1. Wet a paper towel or washcloth with warm/hot water.  Ring out most but not all of the water.
  2. Let the paper towel sit on the dried goo for 5-10 minutes.
  3. Use the same paper towel to easily clean up that stubborn goo.  No harsh chemicals needed!

Wednesday, January 4, 2012

Snowflake Crafts

A great way to celebrate the winter season is to do snowflake crafts.  It's a great way to pass the time with your family when it's cold outside.  Here are some great craft ideas I found that I plan to do with my kids.
Stay warm, have fun and get creative!

Super Simple Chili

A new favorite in my house this winter is chili!  I like to use the McCormick Chili Seasoning Mix.  I base my chili recipe on the McCormick recipe but I add a few things.

Ingredients
  • 1 pkg. McCormick® Chili Seasoning Mix
  • 1 lb. lean ground beef
  • 1 can (14 ½ oz.) diced tomatoes, undrained
  • 1 can (15 to 16 oz.) kidney beans, undrained
  • 1/2 green bell pepper
  • 2 c. cooked rice
  • shredded cheese
Directions
  1. Brown beef in medium pot on medium-high heat.
  2. Stir in McCormick Seasoning Mix, diced tomatoes sauce and kidney beans. Bring to boil; cover. Reduce heat and simmer 10 minutes, stirring occasionally.
  3. Serve over rice and sprinkle with shredded cheese.
*Sometimes I serve the chili as a soup and let the kids scoop it up with Ritz crackers or add Goldfish crackers.  They like to have a part in making their dinner.